
By Cherise Forbes
Fried foods are at the heart of Hanukkah dinner, and close to my heart, too. After all, who doesn’t love a perfectly fried potato?
Devouring dishes drenched in oil isn’t just a holiday indulgence, however, as the tradition harkens back to the very origins of Hanukkah, which commemorates the “miracle of oil” that followed the Maccabean Revolt.
After Jewish rebels successfully reclaimed their freedom from the tyrant king of Damascus, they turned their focus to rededicating Jerusalem’s Second Temple only to find that there was only enough olive oil to keep the menorah lit for one night. Somehow, against all odds, the flames burned for eight in what’s now remembered as the miracle of Hanukkah.
Fittingly, olive oil has historically played a starring role in many Hanukkah meals as well. Fried treats like potato pancakes and jelly donuts remain popular today, though the ingredient is also prominent in un-fried dishes. A truly global tradition, the flavors of this holiday are as complex and multifaceted as the faith that founded it. Some of the most endearing dishes, however, juxtapose fresh Mediterannean flavors with those native to Ashkenazi (or, Eastern European) fare for a sweet and savory feast doused in delicious oil.
HONEY CHALLAH BREAD
In ancient times, olive oil was used for everything from cosmetics to religious rituals. In my kitchen, it’s used for just about everything as well — especially challah bread. While some variations substitute the classic EVOO (extra virgin olive oil) for fats like butter, it’s hard to compete with the earthy sweetness found in the combination of honey, sea salt and olive oil. Plus, every good meal needs a fresh loaf of bread to pass around the table.
True, challah may not be a Hanukkah specific food, but it’s a staple of many families’ celebrations nonetheless. In fact, you’ll likely find challah on the table for every kind of occasion, down to the weekly shabbat dinner. This recipe combines an easy-to-master dough with a braid that looks fancy, but can be toned up or down depending on your skill level. Start it early in the day so it can rise and, after dinner, save the leftovers for the best french toast you’ve ever had.
INGREDIENTS:
- ½ cup warm water (your sink’s highest temperature setting will work fine)
- 1 tablespoon active dry yeast (and a sprinkle of sugar)
- 6 tablespoons olive oil
- ¼ cup honey
- 3 large eggs (use two for the dough, and set aside one for your egg wash)
- 3/4 teaspoon sea salt
- 4 to 4 ½ cups flour
DIRECTIONS:
In a large mixing bowl, combine the warm water and yeast with a sprinkle of sugar. Leave the mixture to proof for about 5 to 10 minutes, until a hefty layer of foam has formed on top.
Add the olive oil, honey and two of the eggs to the yeast mixture and whisk until combined.
Measure out the four cups of flour by carefully spooning it into your measuring cup. Top the flour off with ¾ teaspoon of salt and combine.
Knead the dough by hand until it is soft and smooth, about 10 minutes. If it remains tacky. add more flour until the desired consistency is reached.
Once you’re done kneading, either clean your mixing bowl or grab a new one and cover the inside lightly with olive oil. Place your ball of dough in the bowl and cover with plastic wrap or a damp cloth. Leave the dough to rise in a warm spot for about two hours.
Gently poke the dough to deflate, and transfer it to a work space that is also lightly covered with olive oil. If kneading by hand, rub a little into your palms as well. Decide what kind of braid you want to do—three, four, or even six—and divide the dough into even sections accordingly.
Roll each section of dough into a long rope and combine them at the end to begin your braid. For a three-strand braid, cross each section of dough as if you were braiding hair and combine them again at the end.
Gently move the dough to a parchment paper lined baking sheet, cover with oil-brushed plastic wrap, and let rise for an hour or two. If your house is cooler, lean toward two hours.
Preheat your oven to 375 F when you’re about halfway there, and allow a pizza stone to warm up with it if you have one (if not, your baking sheet will work too). Once your dough is ready, combine the last egg with 1 teaspoon cold water and brush over the bread.
Place the loaf in the oven with an extra sheet of parchment paper (two total) underneath to prevent the bottom from burning. Bake for 20 minutes, then tent the dough with aluminum foil. Cook for another 10 to 15 minutes, or until the bread is a deep golden-brown color.
SHALLOT AND POTATO LATKES

Latkes are said to originate from the story of my favorite historic heroine, Judith. An aspirational figure for fierce, cheese-loving women everywhere, it’s said that Judith took down the Assyrian general Holofernes — whose forces had brought Judith’s town to the brink of death. How did she do it? By tempting him into a stupor with delicious, cheesy pancakes (and plenty of wine).
Eventually, limited access to cheese in Eastern Europe made potatoes the most prominent feature of the latkes we know and love today. These golden, crispy treats are a Hanukkah classic, and the addition of sweet shallots really makes these pancakes perfect. If you’re feeling daring, channel your inner Judith and add shredded parmesan for some dangerously delicious latkes.
INGREDIENTS:
- 2 russet potatoes, peeled
- 1 medium shallot, julienned
- 2 large eggs
- ½ cup flour
- 1 ½ teaspoon sea salt
- olive oil, for frying
- ¼ cup Parmesan, optional
DIRECTIONS:
Using a box grater, shred your potatoes. While you want them small enough to be manageable, you also don’t want them to be too flimsy or your latke may turn to mush. Rinse your potatoes in cold water and squeeze as much moisture out as possible using a cheesecloth or paper towel.
Cut the shallot into similarly sized shreds (julienned) and combine with the potatoes, eggs, flour and sea salt in a large mixing bowl.
Fill a frying pan (cast iron is best), about ⅛-inch high with olive oil and warm over medium heat. To test if your oil is ready, throw in a stray shred of potato. If it immediately begins to bubble, you’re ready to go.
Scoop up a spoonful of your potato mixture, form a ball, and place it in the pan. Flatten the ball with the back of your spoon, and repeat as many times as your pan will allow (you’ll need to fry a few rounds).
Fry each side until it’s a deep, golden brown and set aside to drain on paper towels. Serve warm with sour cream and applesauce.
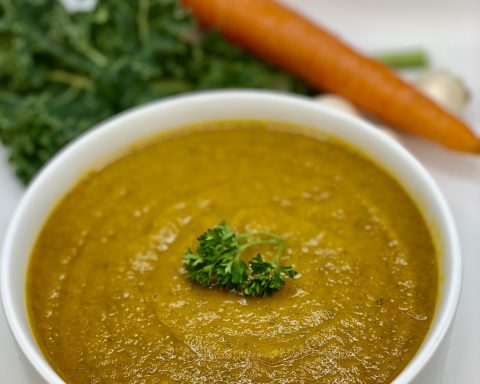
GOLDEN TZIMMES

Tzimmes (pronounced tsim-mes) takes slow-cooking to the next level, and the smell of savory root vegetables roasting alongside rich stone fruits all afternoon will infuse your kitchen with an irresistible aroma. Surprisingly sweet, tzimmes is a yiddish dish traditionally prepared with schmaltz (also known as chicken fat) whose name roughly translates to “a big fuss.” But, while tzimmes does take time to prepare, there’s nothing fussy about the bright and versatile dish with ingredients that can easily be improvised. Use what you have on hand, or adjust your tzimmes to your taste!
INGREDIENTS:
- 3 large sweet potatoes, peeled
- 6 to 9 carrots, peeled
- ½ cup prunes, pitted
- ½ cup apricots, unsulfured
- 1 orange, zested and juiced
- ¾ cup water
- ¼ cup brandy
- ¼ cup olive oil (or schmaltz)
- ¼ cup honey
- Salt and pepper, to taste
DIRECTIONS:
Preheat your oven to 350 F and begin by chopping your sweet potatoes and carrots into equally sized chunks
Combine the vegetables with the prunes and apricots and place in a large, covered baking tray (foil works too).
Mix together the orange zest, orange juice, water, brandy, olive oil and honey to make a syrup. Pour the syrup over the fruits and vegetables in the tray, season with salt and pepper to taste, cover, and cook for one hour.
Uncover and stir after one hour. Return the tzimmes to the oven for approximately one more hour, stirring every 15 minutes or so. Let cool before serving.
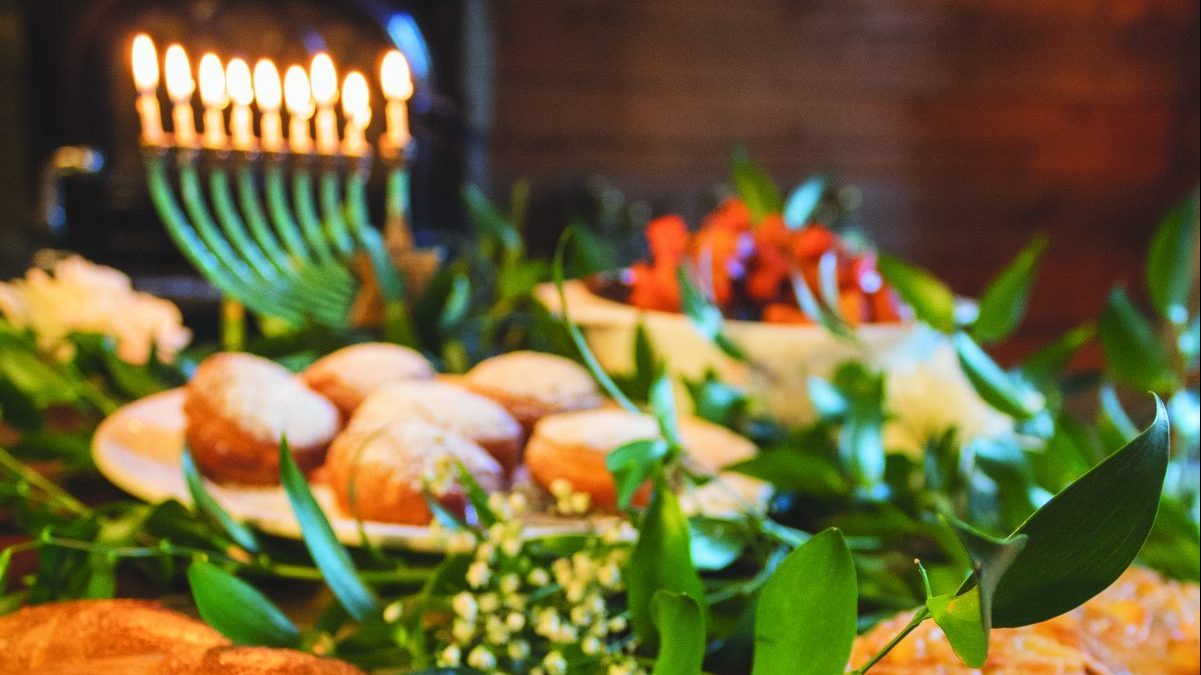
SUFGANIYOT
These festively fried treats may just be the best of them all, especially for those with a bit of a sweet tooth. Sufganiyot goes beyond the classic jelly donut with the earthy addition of — you guessed it — extra virgin olive oil.
Eaten around Hanukkah for centuries throughout both Europe and the Mediterranean, sufganiyot has become a global favorite. Freshly fried in a sea of olive oil, this heartwarming dessert will remind you why this ingredient — and the miracle surrounding it — continues to be celebrated.
INGREDIENTS:
- 1 tablespoon active dry yeast
- 1/2 cup warm water
- 1 orange, zested and juiced
- 2 large eggs, separated
- 3 to 4 cups flour
- 4 tablespoons sugar
- 1 teaspoon sea salt
- ½ teaspoon vanilla extract
- 1 tablespoon brandy
- 6 tablespoons unsalted butter, room temperature
- strawberry jam or other desired filling
- powdered sugar for dusting
- olive oil for frying
DIRECTIONS:
In a large bowl, proof the yeast and water with 1 tablespoon of sugar until a foam forms on top
Whisk in egg yolks one at a time and then add the orange juice, orange zest, brandy, vanilla, about 2 cups of the flour and the remaining sugar. Knead for about five minutes or until combined.
Begin adding the butter 1 tablespoon at a time, kneading thoroughly each time. Add flour between each addition of butter until the dough is smooth and continue kneading on a floured surface for about 5 minutes, until the dough is no longer sticky.
Cover the inside of a clean mixing bowl with olive oil and roll the ball of dough until it is lightly coated. Cover and let rise for approximately one hour.
Roll out the dough on a lightly floured surface and use a small mason jar top (or a cookie cutter) to section out rounds about 2 inches thick. Transfer to a baking sheet and allow the rounds to rise for another hour.
When they’re just about ready, heat 2 inches of olive oil to 350 F in a tall pan with a thick bottom. Once the oil is heated, carefully drop the first round of dough into the pan using tongs. Allow to fry until each side is golden brown and then set the donut on paper towels to dry.
Once all of your donuts are complete, use a piping bag or cleaned condiment container to fill them with strawberry jam or the filling of your choice. If your filling is too thick (or too boring) combine with a drop of brandy before using. Top with powdered sugar.
Cherise Forbes is an independent writer, photographer, and designer based out of Southern Vermont. She currently serves as Communications and Marketing Manager for The BOMA Project, a non-profit organization empowering women entrepreneurs affected by climate change.